Winter Project: Yamaha XT600 "Scrambler"
Mario's Garage
The scope:
In the late eighties they were called "Off-road bikes", in the nineties they got bigger tanks and more plastic covers and were called "Dakar etc." and many were ripped from roadgoing (heavy) bikes.
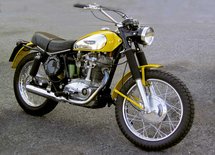
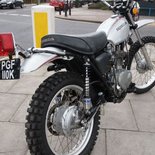
Today the name "Scrambler" is in the fasion again and everyone wants to resemble bikes like the1970's Ducati Scrambler (picture 1) or the 1972 Honda XL250 (picture 2), also heavy, multi-cylinder bikes with knobbed tires get the name "Scrambler", not to my taste even though the new Ducati Scrambler is a really neat bike and justifies the name.
Picture 1. Ducati 350 Scrambler Picture 2. Honda XL250 Motorsport
I really like the old, light, all-road-going single cylinder bikes, especially for riding in the city or on small curvy back roads. I like the styling of the classic ones like those mentioned above.
So why not just go ahead and buy one of those?
The Ducati is hard to find and often quite expensive and the Honda is a bit on the tiny side with low power, antiquated brakes and suspension.
On the other side, I already have a Yamaha XT600E sitting in my shed so why not try to do something with that? And on a budget...
The bike:
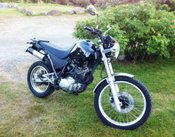
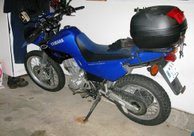
I bought this bike in 2012 from my friends Sven and Annikki Larsson (it was originally Annikis bike, Sorry Annikki for ruining your nice blue motorcycle..) It was a Yamaha XT600E (with electric starter) built in 2002, see picture 3. To the season of 2013 I made a light modification of the bike to look as in picture 4, i.e. version 1.1. The mod included new headlight, new sidepanels and saddle cover, new paint on the tank and new front and rear mudguard.
Picture 3: Version 1.0 "Original 2002 YamahaXT 600E" Picture 4: Version 1.1 "The Houligan Moped"
The project:
First of all, this was planned as a budget project. I wanted to do most work myself in my garage and that limited the extent of the build.
After deciding wich concept to bulid the bike on, a search for parts started. I had a SR500 tank lying around in my garage, but it turned out to be too long for the bike.
After measuring different bikes I settled for a Kawasaki Z440 Custom tank, se more about the tank job below and here.
Tank cap and fuel tap was also found on Ebay.
The custom saddle was purchased at a MC acessory store and medium dark leather was chosen as cover.
The side covers were bought at Ebay. The left one consists of two merged Triumph Bonneville (the old one) covers reproduced in GRP and the right side cover comes from a modern Triumph Bonneville T100.
The rear mudguard comes from a Suzuki GN250 (Ebay once again).
I didn't like the stance that the 21" front wheel gave, so a new 19" aluminium rim (Borani rip-off) was purchased together with new stainless steel spokes.
The bulid started with stripping of tank, saddle and all cosmetic parts. The wheels, swing, forks and engine was kept in the frame.
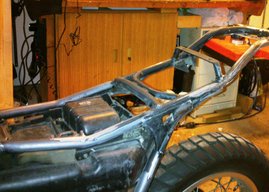
Picture 5 below shows the subframe being relieved from unnecessary brackets and tabs. Later on the rear subframe was cut to fit the rear mudguard, see picture 7..
Picture 5. Work started on the frame, partly stripped Picture 6. The tank prepared for the paint job
The tank and side cover job:
Next was to start working on the tank. After de-rusting of the inside (see separate page here) new mounting brackets were welded on the frame and at the back of the tank. Some minor dents were repaired with filler and the tank was re-spray in grenade apple red metallic. (Picture 6)
The frame is assymmetric behind the engine (the exhaust comes up on the right side where the sub frame starts on the left side) which results in that the side cover on the left side must be much bigger than on the right side to fit in the triangle between the frame tubes.
The left side cover is constructed of two GRP side covers from two 1971 Triumph Bonneville side covers that were cut up and merged into one bigger cover. The right hand side cover is a lightly modified cover from a modern (2004) Triumph T100 Bonneville
A subframe for the saddle was designed, and test assembly is shown in picture 7.
Since the rectifier and control unit is mounted at the far rear on the frame just before the tail light, and this part was cut off, a new location for these was found on top of the airbox. This also included a new routing of the wiring.
Picture 7. Test assembly Picture 8. Paint on the bottom part of the tank
The Wheel job:
To make the bike look more balanced and to imprvee the steering agility, the front wheel was changed form a 21" size down to 19".
A new "Borani" type rim was found on Ebay and new spokes purchased. See picture 9 and 10.
Picture 9. The new rim and painted hub Picture 10. New spokes and nuts
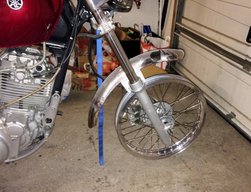
The final assembly of the spokes is a delightful job once you get hold of the subtle tricks that makes the wheel perfect... Picture 11 shows how the forks were used for aligning the wheel by adjusting the spokes in right order. (the bike is hanging from the ceiling, not obvious when you see the Picture).
Picture 11. Working on the front wheel
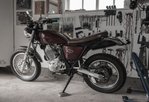
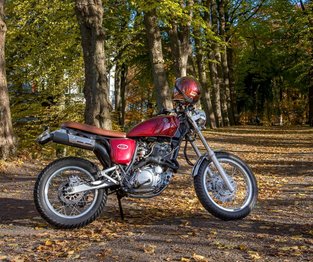
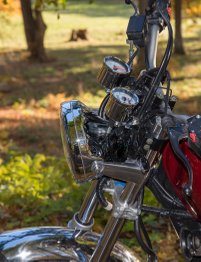
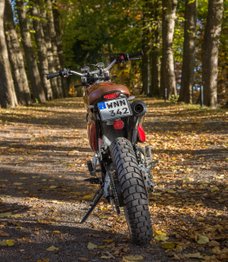
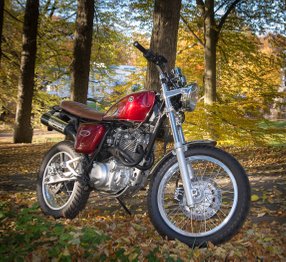
The Final result (..well for this time at least...) Version 2.0 "Scrambler":
Copyright © All Rights Reserved
